This is one of the more satisfying things you can do to your bike. With a bit of practice, you can turn out a very nice job, and fresh bar tape is a pleasure to grip, and dresses up the bike nicely. Besides, if you plan to do a full re-string, this becomes essential.
NOTE: We used an old bar, clamped in a repair stand for this demonstration. This one has a very old, and small brake lever. On a more modern setup, you would peel the rubber brake hoods back, so that the tape work would be under the rubber hood. Otherwise, this is just how we wrap bars.
Here’s a step-by-step:
First, remove the old tape, and clean the bars thoroughly. (This is a good time to inspect the bars carefully for corrosion and cracks.
Got that done? Good! Now open your new tape, and start…
Begin at the end of the bar, and wrap from the inside to the outside, as shown below,
Notice that we’ve started a with about a third of the tape beyond the end of the bar. This will be important later.
This direction of wrap helps keep the tape from unwrapping under your hands as you ride.
Overlap the tape by about a third of the wrap. Keep the tape firmly taut as you proceed. Once you have finished the wrap, come back here, fold the free end of the tape inside the bar, and press the end caps (supplied with the tape) into the bar. This will tidy up and secure the tape at the end of the bar.
As you approach the brake levers, prepare to do a "Figure Eight Wrap."
Don't Panic. We're going to go through this together. Follow below.
One more wrap, with a little closer spacing to go under the control lever.
Now, we're going straight up on the inside of the control.
Shown from the inside here.
And over the top of the control.
Seen again from the outside.
Now we turn and go behind the bar again. But watch the next closely.
You see it from the inside of the control again here...
Now under the control to the outside,
Seen from the outside here.
Now straight up on the outside of the control...
Seen from the inside view.
Still seen from the inside, we now wrap the tape around the bar.
Now we're ready to finish the wrap. Except...
Look for this!
Notice that little triangle of uncovered bar in the middle of the wrap? To fix this, unwrap what you just did, adjust the tape position slightly, and re-wrap as above.
When you have it this tidy, on both sides of the control, you are ready to finish.
Keep wrapping toward the middle of the bar. Resume your one third overlap here.
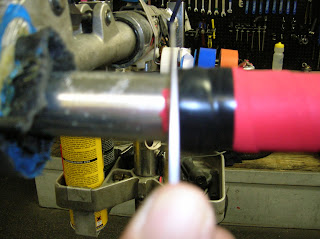
When you reach the stopping point, cut the excess tape on on the diagonal, as shown. Be careful, and don't let go of the tape!
Finish off by wrapping the finishing tape in the same direction as your bar wrapping.
Cut the finish tape off square, and smooth it out.
Trim any rough edges of the tape that might protrude from your finish.
Remember that excess we left beyond the bar, at the beginning of this? Go back to it. Fold it inside of the bar, and push the bar end plug in. It should be pretty tight. That tidies up the beginning of the wrap, hold it in place, and safely dresses the open end of the bar.
Congratulations! you're ready to do the other side. It's the same, just a mirror image of the work you've already done.


No comments:
Post a Comment